

Things used in the pet feeder project
Hardware components
M5Stack Core2 ESP32 IoT Development Kit
M5Stack Mini Dual Button Unit
M5Stack Servo Kit 360° LEGO-compatible
M5Stack Connector Grove to 4 Pin
Software apps and online services
Waylay
Story
Motivation
We love our pets, for many of us, they are a part of our family with full rights. While at home, you can easily sense their wishes and basic needs, but being remote is something else. Feeding them involves asking neighbours or close friends. Enough of that!
Let's build a smart pet feeder to automate food dispensing at certain intervals, monitor the pet’s eating habits, and train the pet to press a button to receive food.
The main purpose of this tutorial is to get you started on IoT development using the Waylay IO low-code platform.
Let’s get started!

Hardware requirements
For the pet feeder tutorial, we have decided to use the M5Stack Ecosystem because it offers the possibility of building such a system without prototyping specific tools, such as a soldering iron or prototyping cables. The brain of the pet feeder is the M5Core2, an IoT development kit based on the ESP32 microcontroller.
This ecosystem allows you to connect the provided modules through a GROVE port to the M5Core2, allowing fast deployment of hardware.
The modules we’ve picked for this tutorial are M5Stack’s LEGO-compatible Servo Kit 360° as the actuators for dispensing the food and the Mini Dual Button Unit as the input modules the pet will interact with.
_WPeuRzygol.jpeg)
Enclosure(s) for food - 3D prints
We have adapted the very nice 3D printed Servo Screw system done by this user on Thingverse.
We only printed one for demo purposes, but you can print two to have different flavours of food or maybe food and water. We have used a plastic bottle to store the food on top of the adapter. Yay, upcycle!
Wire Connections
- Connect the Mini Dual Button Unit to PORT A of the M5Core2 (the red port near the USB-C connector) using the Grove cable.
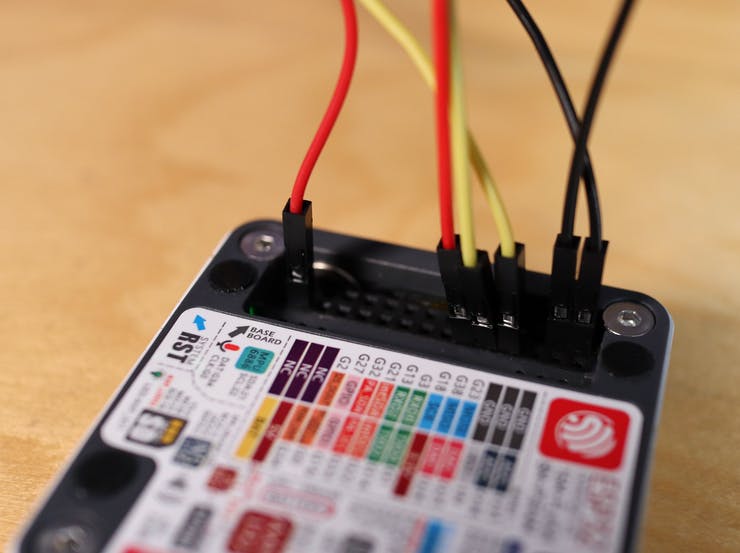
- Take out the CORE2 plate on the back to expose the pins.
- Connect one of the servo motors using the male to male Dupont wires to the following pins:
BROWN - GND
RED - 5V
YELLOW - G25
- Connect the other servo motors using the male to male Dupont wires to the following pins
BROWN - GND
RED - 3.3V
YELLOW - G26
Prerequisites
- Install M5Burner according to your OS.
- Install Thonny following the steps on the official website.
Setting up the device
- Connect the M5Stack kit to your PC using the provided USB Type-C cable and launch M5Burner. The port name should appear on the top-left corner of the app (near COM).
On Linux, make sure your user is part of the dialout group by running:
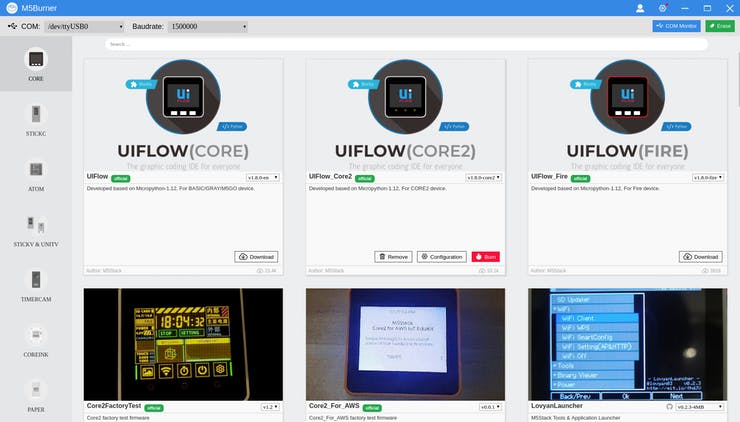
- Download the UIFlow(CORE2). Click the Erase button and wait for it to finish.
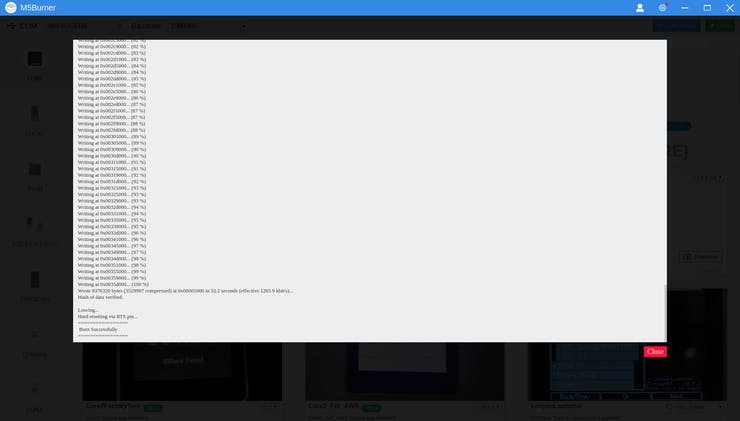
- Click on the Burn button to upload the UIFlow(CORE2) firmware on the device. We have used 1.8.1_core2 . You will be prompted for the WiFi details that the device will use to connect to your local network. If the burn fails, change the baud rate to a lower one.
- Now click on the Configuration box corresponding to UIFlow(Core2) and select App Mode from the dropdown in the provided screen and add the Wifi details if not present.
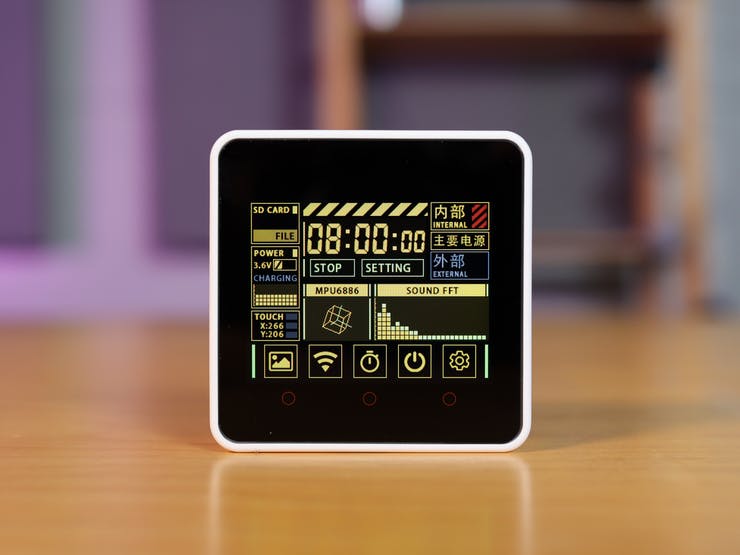
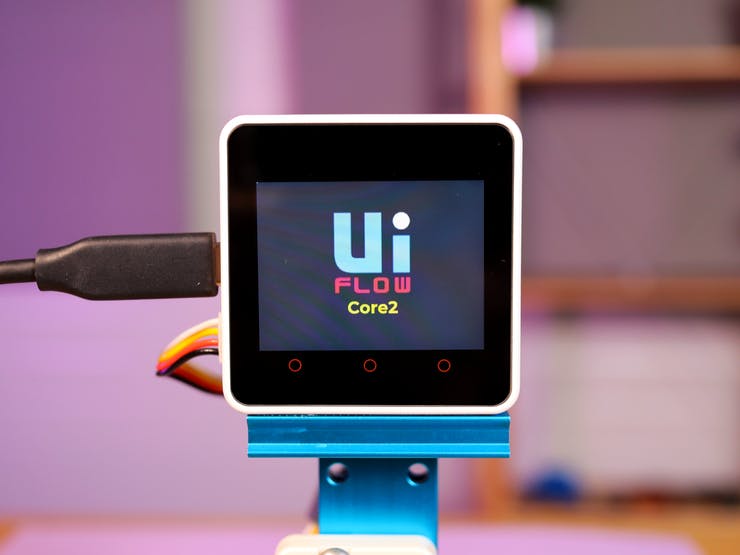
- After it finished rebooting, you will be greeted by an initial screen with the UiFlow version in the top right.
Now let's set go ahead and up the cloud solution!
Setting up the cloud solution
Register on Waylay IO if you have not already and log in.
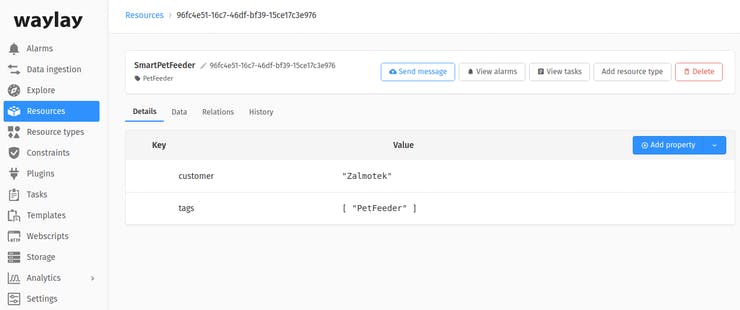
- Go to Resources and add a resource. Name it something like SmartPetFeeder. This resource is practically your device representation in the cloud where you will send the data.
- Add a new property with the customer key and the Zalmotek value.
- Add another property with the tags key and the [ "PetFeeder" ] value.
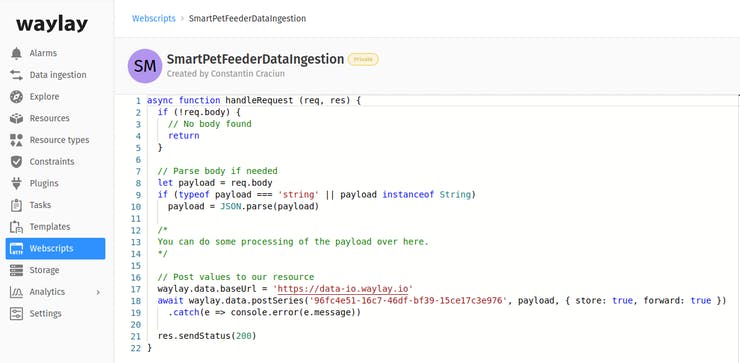
- Go to Webscripts in the left main menu and add a new one. Name it something like SmartPetFeederDataIngestion and add the following code in the body:
Be sure to replace the replace_with_resource_id placeholder with the actual resource_id from the above step. Navigate to the resource page to get it. Ours is something like 96fc4e51-16c7-46df-bf39-15ce17c3e976. Press Save once you have pasted the correct details.

Programming the device
- Go to the GitHub repository of this project (also present in the Code block of this tutorial) and download the zip file containing all necessary code and unpack it in a folder (or use the git command-line interface to do the same thing like a pro.
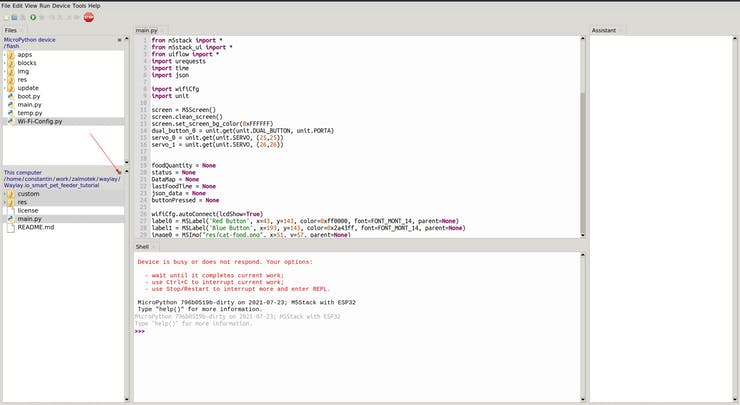
- Launch Thonny and from Run -> Select interpreter set up the interpreter to MicroPython (ESP32) and while at it pick the device port.
- Click on the Shell text field, press CTRL+C, or press the STOP button to connect to the device. Once you see the >>> symbol, you can access the files on the device. Go to View and select Files to set up your workspace. Then go to the temp.py file provided in this tutorial (check the Github Repository link in the Code section below) and edit the URL in the SendPOST() function with the URL of your Webscript. You can find it on https://console-io.waylay.io/webscripts, below the name of your Webscript. Click it to copy it to the clipboard (make sure the secret is included).
- Select all the files from the folder downloaded from GitHub by holding Shift and clicking the files (main.py, and the 2 folders: custom, res, files provided in this tutorial). Exclude the Readme file, right-click on the menu icon (3 horizontal lines as shown below) and press Upload to /flash, press ok and you are set. Confirm the files being overwritten.
- At this point be sure to have all the sensors connected as instructed before or else the program will hang on a white screen.
- Reboot the M5Stack by pressing the down-side button, the one near the sd card slot (the screen will shut down and refresh). The device will connect to the WiFi network and automatically run the main.py file.
_Wff9LwPiMf.jpeg)
- When the device successfully sends the data to the server you will get a Data sent message on the bottom-left side of the display and the 200 HTTP status code on the bottom-right side of the display (meaning the request was successfully received, understood, and accepted).
_TKyJYAwQVe.jpeg)
Here's a demo of the smart pet feeder (There is clearly more time needed for the pet to get the hang of it and start using the buttons on their own :))).
Setting up an alarm
Alarms are a useful function through which you can get notified when the monitored values reach unwanted levels.
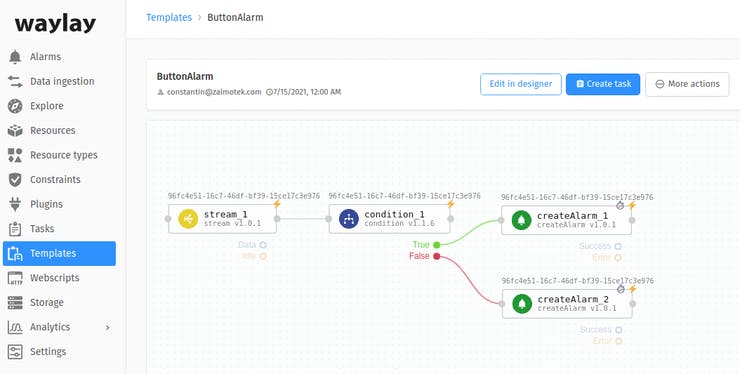
- Select the Templates field from your user console and click on the Add Template button.
- To create a basic alarm flow, we will be adding the necessary blocks from the blocks menu and then configure them. Add a Stream block, uncheck execute on tick and check execute on data and select your Resource of choice.
- Add a Condition block, uncheck execute on tick and check execute on data and select your Resource of choice. In the condition field write up the condition in the following format:
- In our example, the metrics you can choose from are the ones defined in the DataMap variable in temp.py (foodQuantity, ButtonPressed, ButtonID). Let’s make an alarm to check whether the Red or the Blue button was pressed:
- Add a Create Alarm block, uncheck execute on tick, check execute on data, and select your Resource of choice. Also, fill in your alarm text: “Red button pressed”, your desired alarm severity (CRITICAL, MAJOR, MINOR, or WARNING), and assign an alarm type.
- Create another alarm with the “Blue button pressed” text.
- While setting up the alarm, pay attention when filling in the Alarm Type field. The Alarm Type is the property of an alarm that uniquely defines it, it is the “name” of the kind of alarm if you will. Alarms of the same type get grouped together. The text on the other hand only gives some context and does not have to be unique. In our case, we have assigned two different alarm types for the 2 buttons we have on our device: "BlueButtonPressed" and "RedButtonPressed".
- Connect the blocks as in the picture below.
- Click on the Save button and choose a name for your template.
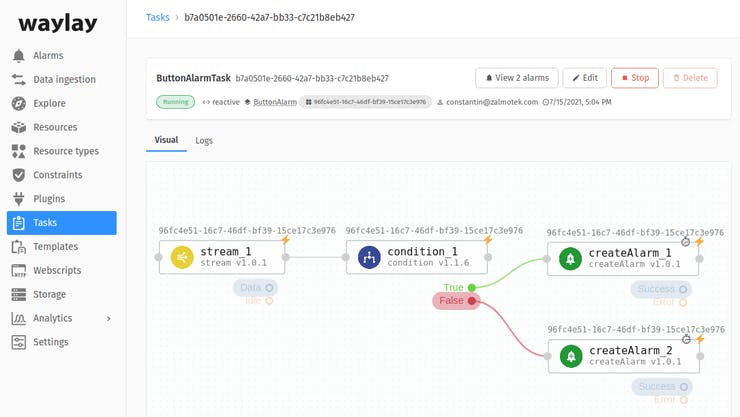
- Now that you have returned to the Templates menu, select the previously created template and click on Create Task.
- Chose a name for your task, select the Resource choosing Reactive mode and click on Create Task.
- Now the Task is created and when the condition is met, an alarm will be triggered and it will be displayed in the Alarms field of your console and also in your dashboard linked to the same Resource as the Alarm.
- Press the red button and the blue button on the device and after that, open the Alarms field in your console. It should look something like this:

Creating a dashboard
Now that we managed to consistently send data to our cloud solution, it’s time to set up a dashboard to display it.
- Head to dashboard-io.waylay.io/ and log in with your account data.
- Create an organization by clicking on the + sign. The name of this organization must be identical to the customer name (metadata property) you have used when defining your Resource.
- Click on Log in as admin.
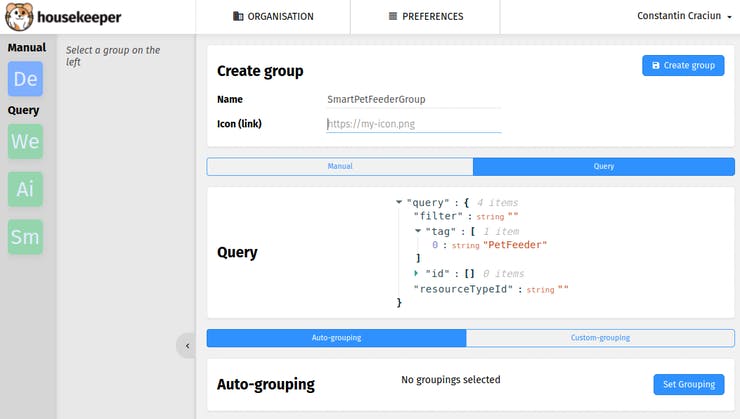
- Click on the + sign in the bottom left, click on Query, and in the tag field fill in the value of the tags property you have picked for your Resource.
- Name your group and finally click on Create group.
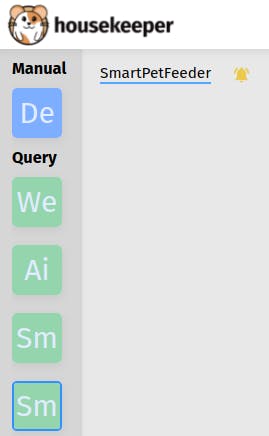
- Click on your query and then on your resource name.
- Click on the + sign next to My dashboard, select the desired representation, select the metric you want to represent, and then click Save. Ours looks something like this:
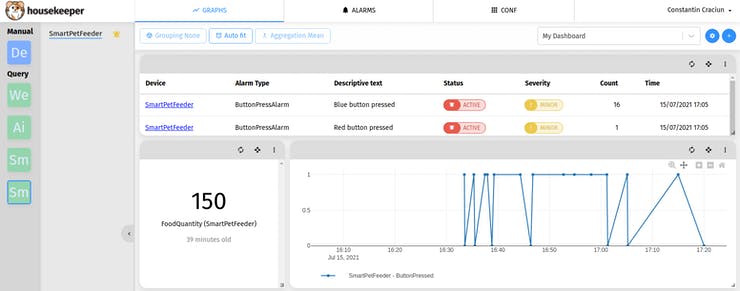
- Our dashboard is made out of an Alarm widget that signals us when the button press took place, a Bulletin widget that displays the food quantity delivered by the device and a scatter plot that shows us the history of button presses.
- After adding all widgets, click on the cogwheel next to the + sign and then click Publish.
- Click on My dashboard and select your dashboard (notice that the + sign disappears), click on the cogwheel, click on manage and then select public.
By clicking on the connectivity button, you can get the link for your public dashboard to share with your friends or access it from any browser.
What’s next?
We have a series of tutorials with other use cases that you could learn from and further sharpen your IoT skills or you could start your very own project.
If you need help in deploying this solution or building something similar please contact Waylay.io for the low-code IoT Solution or Zalmotek.com for IoT-enabled hardware prototypes.


'%3e%3cg id='Final-Copy-2_2_' transform='translate(1275.000000, 200.000000)'%3e%3cpath class='st0' d='M7.4,12.8h6.8l3.1-11.6H7.4C4.2,1.2,1.6,3.8,1.6,7S4.2,12.8,7.4,12.8z'/%3e%3c/g%3e%3c/g%3e%3c/g%3e%3cg id='final---dec.11-2020'%3e%3cg id='_x30_208-our-toggle' transform='translate(-1275.000000, -200.000000)'%3e%3cg id='Final-Copy-2' transform='translate(1275.000000, 200.000000)'%3e%3cpath class='st1' d='M22.6,0H7.4c-3.9,0-7,3.1-7,7s3.1,7,7,7h15.2c3.9,0,7-3.1,7-7S26.4,0,22.6,0z M1.6,7c0-3.2,2.6-5.8,5.8-5.8 h9.9l-3.1,11.6H7.4C4.2,12.8,1.6,10.2,1.6,7z'/%3e%3cpath id='x' class='st2' d='M24.6,4c0.2,0.2,0.2,0.6,0,0.8l0,0L22.5,7l2.2,2.2c0.2,0.2,0.2,0.6,0,0.8c-0.2,0.2-0.6,0.2-0.8,0 l0,0l-2.2-2.2L19.5,10c-0.2,0.2-0.6,0.2-0.8,0c-0.2-0.2-0.2-0.6,0-0.8l0,0L20.8,7l-2.2-2.2c-0.2-0.2-0.2-0.6,0-0.8 c0.2-0.2,0.6-0.2,0.8,0l0,0l2.2,2.2L23.8,4C24,3.8,24.4,3.8,24.6,4z'/%3e%3cpath id='y' class='st3' d='M12.7,4.1c0.2,0.2,0.3,0.6,0.1,0.8l0,0L8.6,9.8C8.5,9.9,8.4,10,8.3,10c-0.2,0.1-0.5,0.1-0.7-0.1l0,0 L5.4,7.7c-0.2-0.2-0.2-0.6,0-0.8c0.2-0.2,0.6-0.2,0.8,0l0,0L8,8.6l3.8-4.5C12,3.9,12.4,3.9,12.7,4.1z'/%3e%3c/g%3e%3c/g%3e%3c/g%3e%3c/g%3e%3c/svg%3e) Privacy Choices
Privacy Choices